
Battlegroups / Australian Defense Battlegroup
British Forces
Australian Defense Battlegroup
Establish the frontline with Australian infantry and long-range defensive units backed by supply trucks to create a strong economy.
Logistical Supremacy
T1
CMP 15cwt Supply Run
Support / Select Friendly Munition or Fuel Point
Deploy a Supply Truck to gather resources from the target fuel or munitions point before returning to Headquarters for drop-off. Amount delivered is based on distance travelled. Resource type is based off the resource point. \r \r Truck will leave the map if the point is contested, captured or after the resources are delivered. Enemies that destroy loaded trucks are rewarded the resources instead.
T2
Reinforced Resource Caches
Passive
T3
Artillery Trip Wire Flares
Production Unlock / Passive
Allows Royal Engineers and Australian Light Infantry to build Artillery Trip Wire Flares. When these mines are triggered by enemies, they provide temporary vision with a flare and a single artillery shell is fired at the mine's previous location.
T4

Charged Creeping Barrage
Offensive / Select target position
Designates an artillery barrage along a set-path that intensifies over time. Large blast radius. Extremely effective against stationary targets.
T5
Archer Tank Destroyer
Call-in / Select target position
Frontline Defenders
T1

Australian Light Infantry Section
Call-in / Select target position
T2
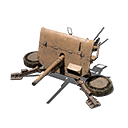
2-pounder Anti-tank Gun Team
Call-in / Select target position
T3
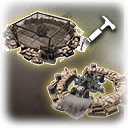
Defensive Tactics
Production Unlock / Passive
Allows Royal Engineers and Australian Light Infantry to build Bofors and 17-pounder Emplacements. \r \r Bofors Anti-air Emplacement: Effective against infantry, light vehicles, and aircraft. \r 17-pounder Anti-tank Emplacement: Long-range emplacements extremely effective against all vehicles.
T4

Vehicle Over Repair
Passive
T5
Hold the Line!
Defensive / Timed